> ## Documentation Index
> Fetch the complete documentation index at: https://fdm.furkankursav.com/llms.txt
> Use this file to discover all available pages before exploring further.
# Quick Start
After you added the asset package to your project, follow these steps to make it work:
### 1. Import the Layout Tags
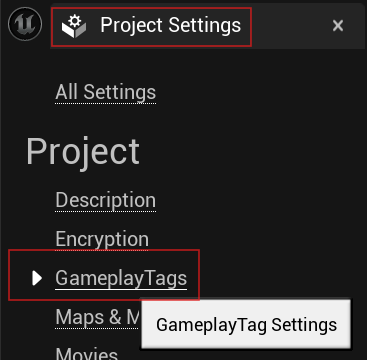
Open your project's gameplay tag settings from `Edit > Project Settings > Gameplay Tags`
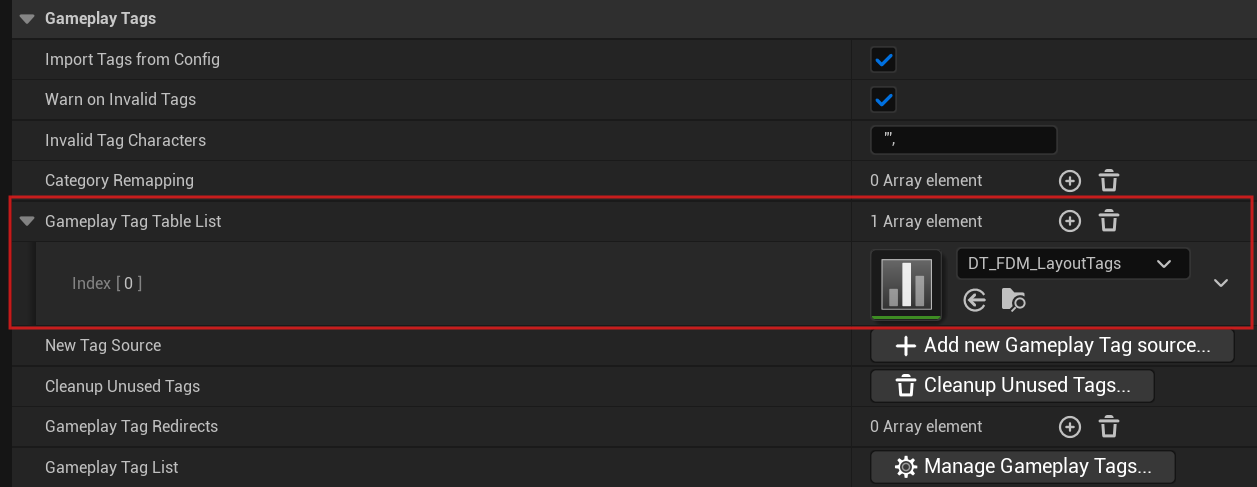
 add `DT_FDM_LayoutTags` to your `Gameplay Tag Table List`.
 ### 2. Add AC\_FDM\_Component
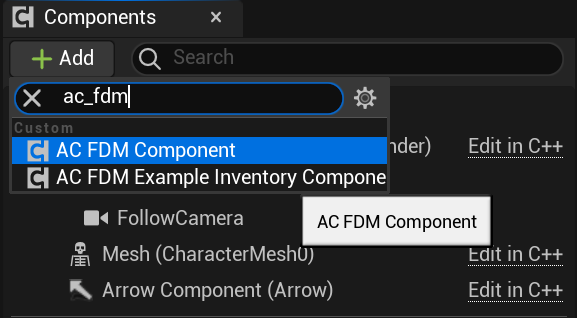
Add `AC_FDM_Component` to your **Player Character** or **Player Controller**.
### 2. Add AC\_FDM\_Component
Add `AC_FDM_Component` to your **Player Character** or **Player Controller**.
 ### 3. Assign a Config asset
Assign a Config asset for the component.
### 3. Assign a Config asset
Assign a Config asset for the component.
 ### 4. Add Input Actions
Add the following input actions:
* `IA_FDM_SelectDown`
* `IA_FDM_SelectLeft`
* `IA_FDM_SelectRight`
* `IA_FDM_SelectUp`
### 4. Add Input Actions
Add the following input actions:
* `IA_FDM_SelectDown`
* `IA_FDM_SelectLeft`
* `IA_FDM_SelectRight`
* `IA_FDM_SelectUp`
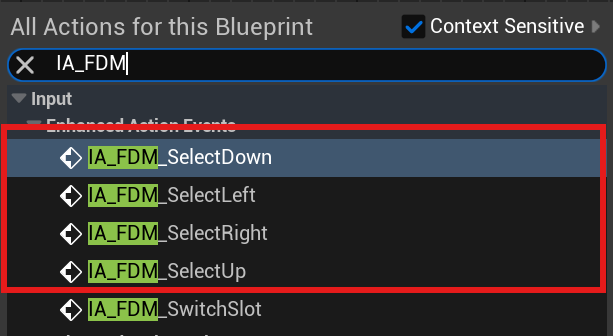 Then call FDM Directional Input function on Triggered Event with corresponding direction input.
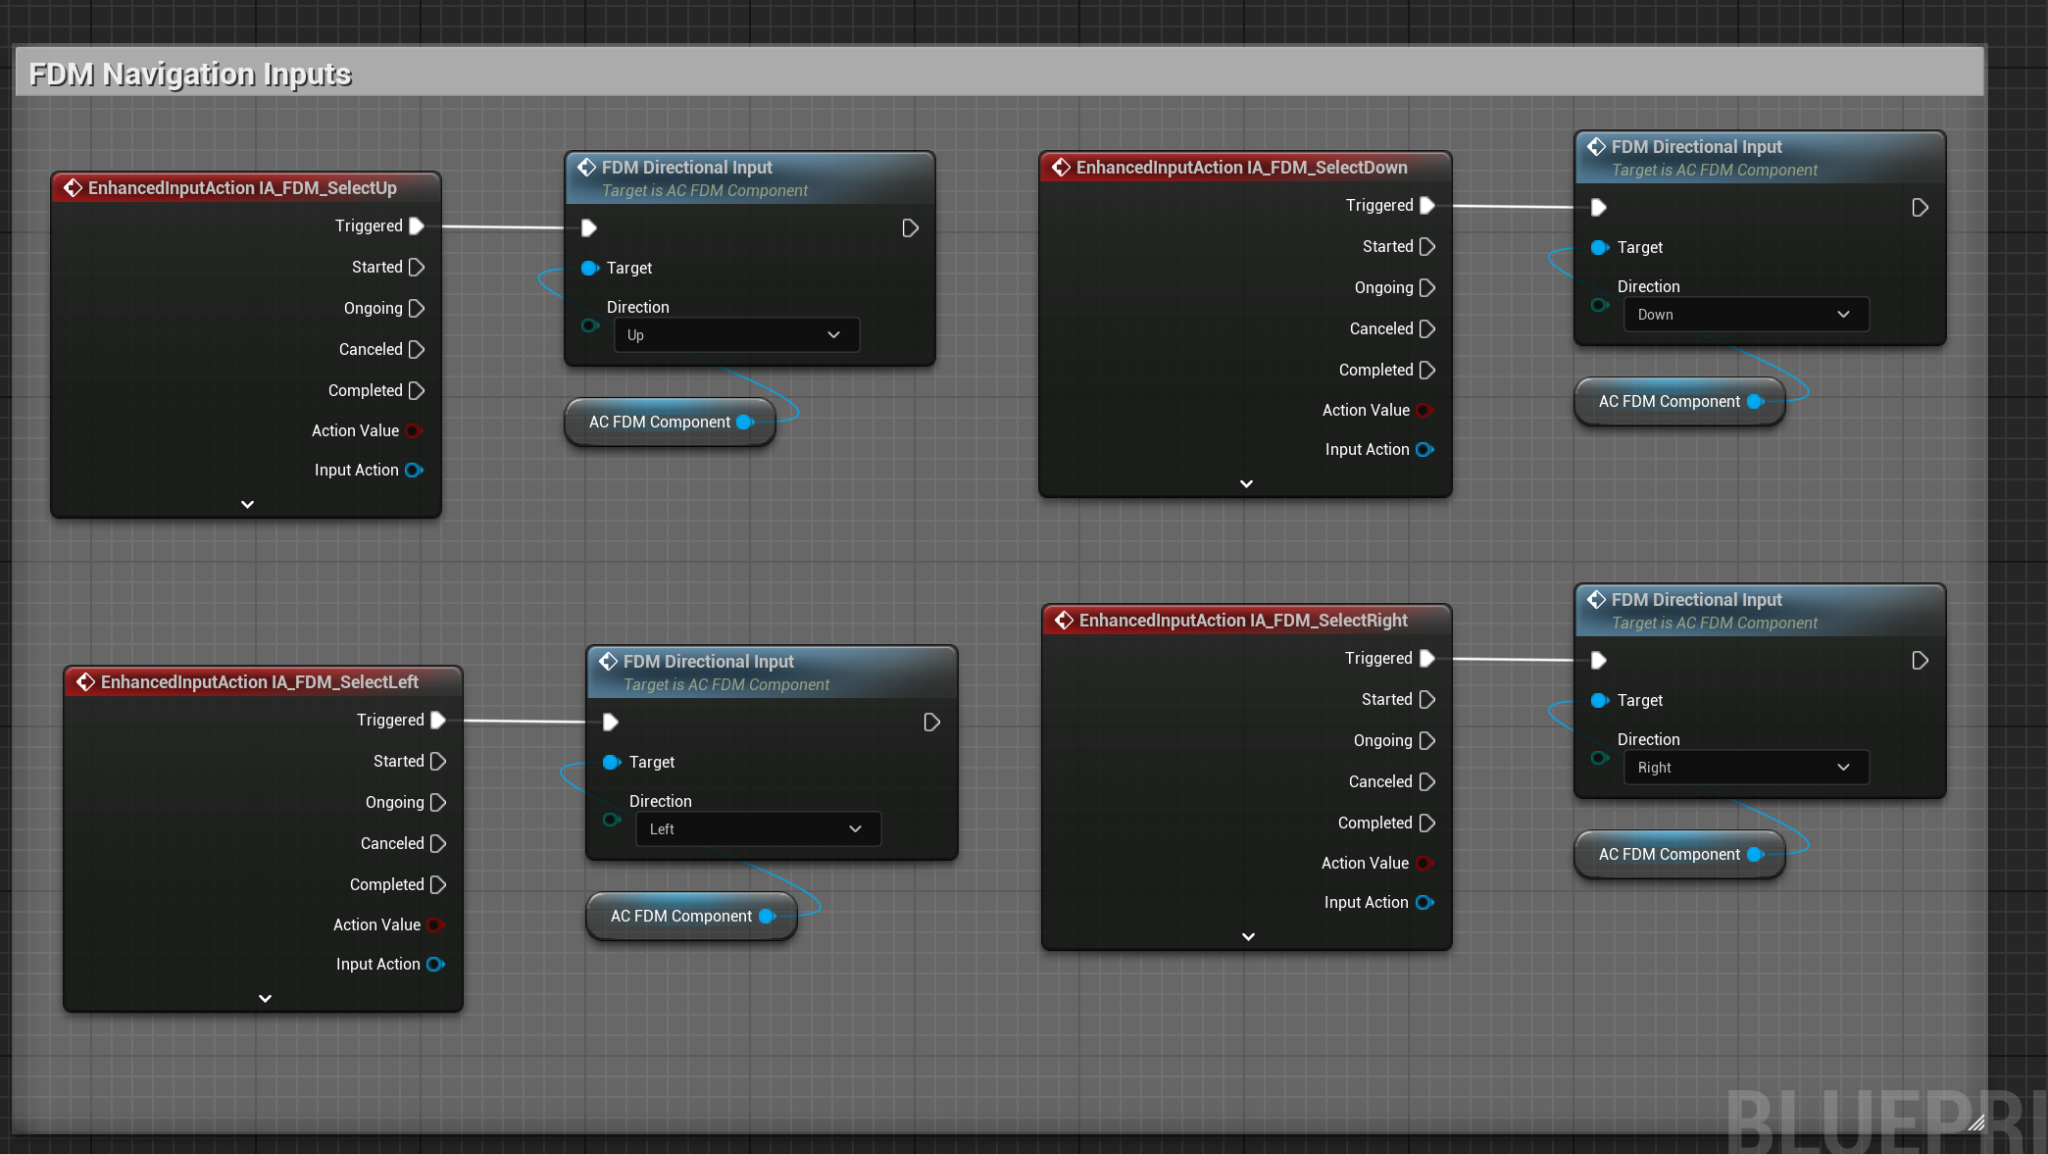 | Input Action | Function |
| -------------------- | ----------------------------- |
| IA\_FDM\_SelectUp | FDM Directional Input (Up) |
| IA\_FDM\_SelectDown | FDM Directional Input (Down) |
| IA\_FDM\_SelectLeft | FDM Directional Input (Left) |
| IA\_FDM\_SelectRight | FDM Directional Input (Right) |
### 5. Optional: Example Inventory
Add `AC_FDM_ExampleInventoryComponent` and assign a starting item asset.
| Input Action | Function |
| -------------------- | ----------------------------- |
| IA\_FDM\_SelectUp | FDM Directional Input (Up) |
| IA\_FDM\_SelectDown | FDM Directional Input (Down) |
| IA\_FDM\_SelectLeft | FDM Directional Input (Left) |
| IA\_FDM\_SelectRight | FDM Directional Input (Right) |
### 5. Optional: Example Inventory
Add `AC_FDM_ExampleInventoryComponent` and assign a starting item asset.
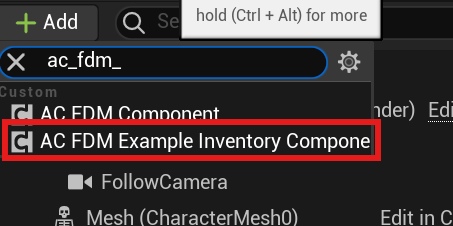
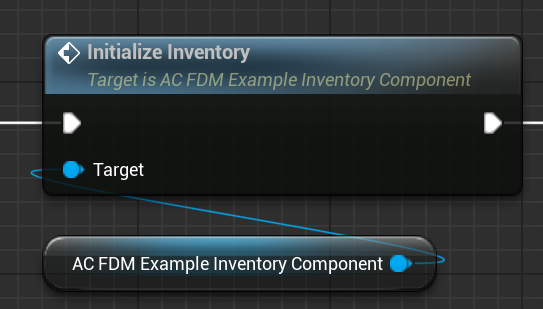
 Then initialize the inventory on Begin Play.
 ### 6. Initialize the FDM Component
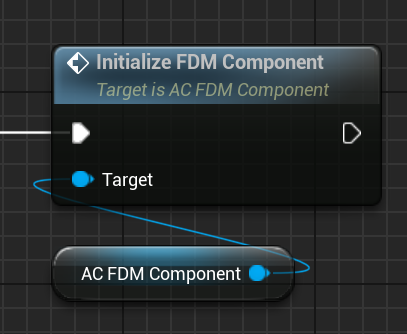
Call **Initialize FDM Component** when your character/controller is ready (typically on Begin Play).
### 6. Initialize the FDM Component
Call **Initialize FDM Component** when your character/controller is ready (typically on Begin Play).
 ### 7. Use your own system
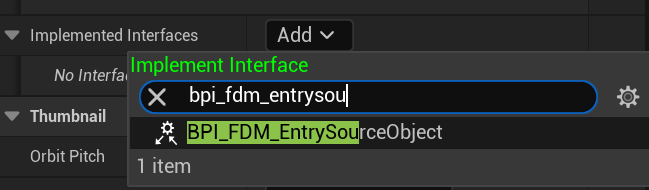
Open the blueprint of the object (must derive from `UObject`) and implement the `BPI_FDM_EntrySourceObject` interface.
### 7. Use your own system
Open the blueprint of the object (must derive from `UObject`) and implement the `BPI_FDM_EntrySourceObject` interface.
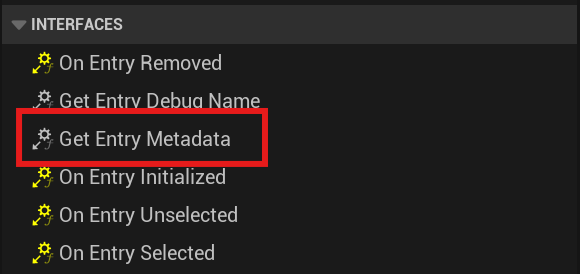
 The most important function is `Get Entry Metadata`.
 ### 8. Add entries
Add entries by using the **Add New Entry** function.
### 8. Add entries
Add entries by using the **Add New Entry** function.
